Total Time: 16-20 hours (mostly hands-off fermenting)
Active Time: 30 minutes
Difficulty: Intermediate
Yield: 1 beautiful loaf (about 16 slices)
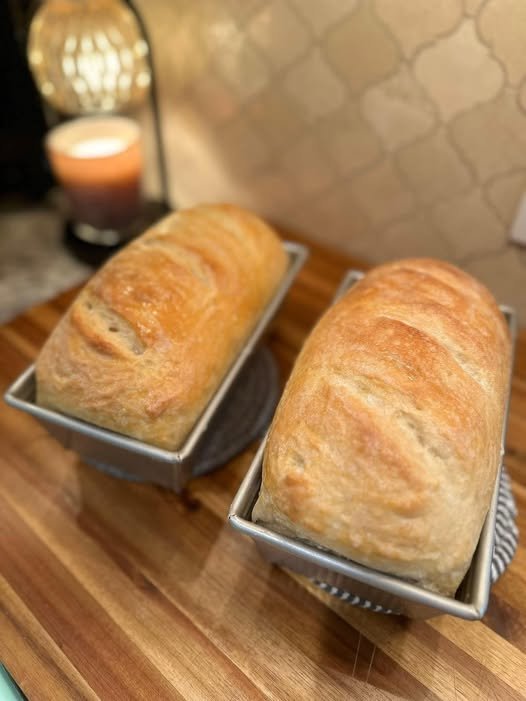
There’s something deeply satisfying about baking a loaf of sandwich bread that begins with a bubbling sourdough starter. This recipe yields a loaf with the perfect balance: a tender, soft crumb ideal for slicing, a subtle tang from natural fermentation, and a golden, slightly crisp crust. It’s a labor of love that spans a day, but the active work is minimal. The result is a wholesome, flavorful bread that makes even a simple peanut butter and jelly sandwich feel like a gourmet experience.
Ingredients
For the Levain (Pre-Ferment):
-
40g active, bubbly sourdough starter (100% hydration)
-
80g bread flour
-
80g lukewarm water (about 85°F/29°C)
For the Main Dough:
-
All of the prepared levain (about 200g)
-
360g bread flour
-
40g whole wheat flour (for flavor and nutrition; can use all bread flour)
-
260g lukewarm water (about 90°F/32°C)
-
9g fine sea salt
-
20g honey or maple syrup (optional, for a hint of sweetness and softer crumb)
-
20g unsalted butter or olive oil, softened (for richness and tenderness)
You’ll Also Need:
-
A standard 9×5-inch loaf pan
-
A clean kitchen towel or proofing basket
-
A sharp lame, razor blade, or very sharp knife for scoring
Instructions
Day 1: Evening – Create the Levain
-
Mix: About 8-12 hours before you plan to mix your dough (typically in the evening), combine the 40g starter, 80g bread flour, and 80g lukewarm water in a small jar or bowl. Stir until no dry flour remains.
-
Ferment: Cover loosely and let it sit at room temperature (70-75°F is ideal) overnight. It’s ready when it’s at least doubled in size, bubbly, and passes the “float test”: a small spoonful dropped in a glass of water should float.
Day 2: Mixing, Bulk Fermentation, & Shaping
-
Autolyse (Rest the Flour): In the bowl of a stand mixer or a large mixing bowl, combine the 360g bread flour, 40g whole wheat flour, and 260g lukewarm water. Mix until just combined and no dry bits remain. Let this shaggy mixture rest, covered, for 30 minutes. This allows the flour to fully hydrate and gluten to start developing naturally.
-
Mix the Dough: Add the ripe levain, honey (if using), and softened butter/oil to the bowl. Using the dough hook attachment on low speed (or by hand with a sturdy spoon), mix for 2-3 minutes until everything is incorporated. It will look messy at first but will come together.
-
Add Salt: Sprinkle in the 9g of salt. Mix on medium-low speed for 6-8 minutes (or knead by hand for 10-12 minutes) until the dough is smooth, slightly tacky but not sticky, and pulls away from the sides of the bowl. It should pass the “windowpane test”: stretch a small piece between your fingers; it should form a thin, translucent membrane without tearing immediately.
-
-
Bulk Fermentation (The First Rise): Place the dough in a lightly oiled, clear container. Cover and let it rise at room temperature for 4-6 hours. This is the most critical step for flavor development.
-
Perform Stretch & Folds: During the first 2 hours, perform 3-4 sets of “stretch and folds,” spaced 30 minutes apart. To do this, wet your hand, grab one side of the dough, stretch it upwards, and fold it over the center. Repeat on all four sides. This strengthens the gluten without heavy kneading.
-
The dough is ready when it looks puffy, has increased in volume by about 50%, and is dotted with small bubbles. It will feel airy and jiggle if you shake the container.
-
-
Shape the Loaf: Gently turn the dough out onto a lightly floured surface. Using your hands or a bench scraper, shape it into a rough rectangle. Fold the right side to the middle, then the left side over that (like a letter). Starting from the top, roll the dough tightly into a log, sealing the seam with the heel of your hand. Pinch the final seam and ends closed.
-
Final Proof (The Second Rise): Place the loaf seam-side up in a towel-lined proofing basket or seam-side down in a greased loaf pan. Cover lightly with a damp towel or plastic wrap.
-
Option A (Room Temp): Proof for 2-3 hours at room temperature, until the dough is puffy and springs back slowly when gently poked.
-
Option B (Cold Retardation – For Best Flavor): For a more pronounced sour flavor and easier scheduling, place the covered loaf in the refrigerator for 8-16 hours (overnight is perfect).
-
Day 2 (or 3): Baking
-
Preheat: At least 30 minutes before baking, place your oven rack in the middle position and preheat the oven to 400°F (200°C). If you cold-proofed your dough, take it out of the fridge while the oven preheats.
-
Score: If your loaf is in a basket, carefully invert it into the loaf pan or onto a parchment-lined baking sheet. Using a sharp blade, make one swift, shallow slash lengthwise down the center of the loaf. This controls expansion and gives a professional “ear.”
-
Bake: Place the loaf in the oven. For extra steam (which gives a better oven spring and shinier crust), you can place a pan of ice cubes on the bottom rack or spritz the loaf with water before closing the door.
-
Bake for 20 minutes.
-
Reduce the oven temperature to 375°F (190°C).
-
Rotate the pan and bake for another 25-30 minutes, until the loaf is deeply golden brown and sounds hollow when tapped on the bottom. An internal thermometer should read 205-210°F (96-99°C).
-
-
Cool: This is the hardest but most important step! Immediately remove the bread from the pan and let it cool completely on a wire rack for at least 3-4 hours before slicing. Cutting too soon will release steam and make the crumb gummy.
Nutrition Information (Per Slice, 1/16 of loaf)
-
Calories: ~140 kcal
-
Total Fat: 1.5g
-
Saturated Fat: 0.8g
-
Cholesterol: 3mg
-
Sodium: 220mg
-
Total Carbohydrates: 27g
-
Dietary Fiber: 1g
-
Sugars: <1g (without honey)
-
Protein: 4g