-
Prep Time: 30 minutes (active)
-
Bulk Fermentation (Rise): 4-6 hours (at room temperature)
-
Cold Proof (Optional but Recommended): 8-12 hours (overnight in the fridge)
-
Final Proof (Warm Method): 2-3 hours
-
Bake Time: 40-45 minutes
-
Total Time: Approximately 15 hours (including overnight rest)
-
Skill Level: Intermediate
-
Yield: One 9×5-inch loaf
Why You’ll Love This Loaf
-
Perfect Texture: Achieves that perfect balance between a soft, tender crumb and a sturdy structure—no more sad, squished sandwiches!
-
Classic Sourdough Flavor: The long, slow fermentation develops a deep, complex tang that you just can’t get from commercial yeast bread.
-
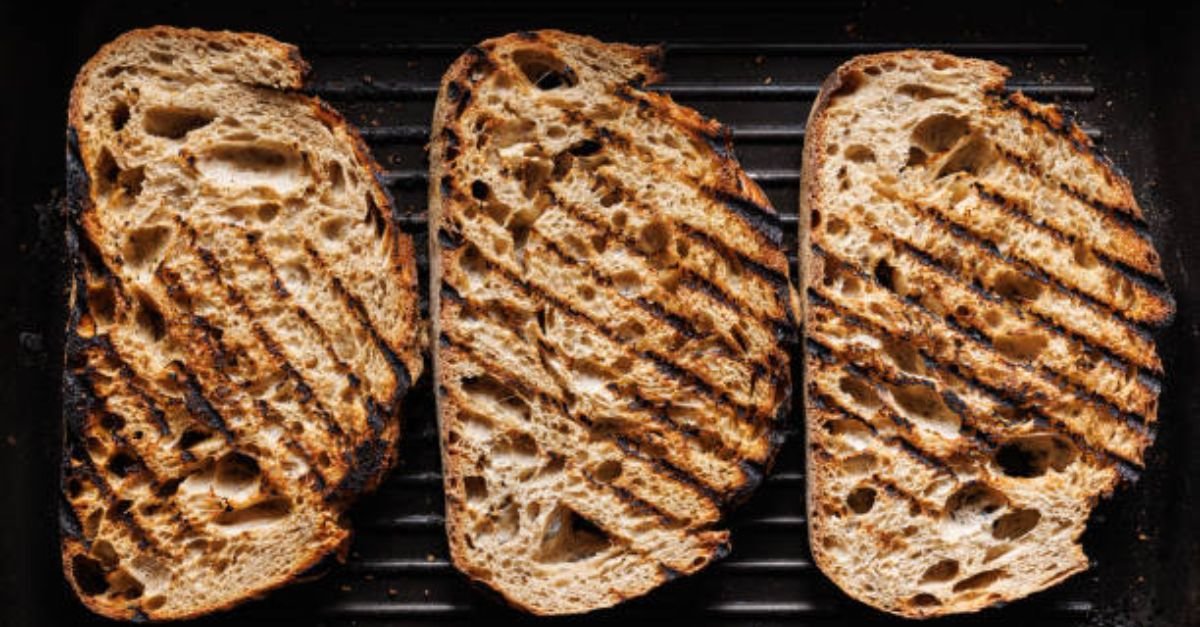
Versatile: Makes incredible toast, amazing grilled cheese, and the foundation for your favorite avocado toast.
-
Cleaner Ingredients: Just flour, water, salt, and your bubbly sourdough starter. No preservatives, no added oils or sugars (unless you choose to add them).
Ingredients
-
400g (about 3 cups) Strong White Bread Flour (High protein content is key for structure)
-
100g (about ¾ cup) White Whole Wheat Flour or All-Purpose Flour (Adds a bit of depth and nuttiness. You can also use all bread flour for a whiter, softer crumb)
-
350g (about 1 ½ cups) Water, lukewarm (Filtered or non-chlorinated is best)
-
100g (about ½ cup) Active Sourdough Starter (100% hydration, fed and bubbly)
-
10g (about 1 ½ tsp) Fine Sea Salt
Optional Add-ins for a richer loaf:
-
15g (1 tbsp) softened butter or olive oil (added during the stretch and folds)
-
1 tbsp honey or sugar (added with the water)
Equipment Needed
-
9×5-inch Loaf Pan (metal is preferred for better heat conduction)
-
Large Mixing Bowl
-
Digital Kitchen Scale (highly recommended for accuracy)
-
Dough Scraper
-
Plastic Wrap or a Clean Shower Cap
-
Proofing Basket (Banneton) or a second bowl lined with a floured tea towel (optional, for the final proof)
-
Parchment Paper
-
Lame or very sharp knife/scissors for scoring
Instructions
This recipe is broken down into manageable steps over two days. The active work time is minimal; most of it is waiting for the yeast to do its job.
Day 1: Mix, Fold, and Shape
Step 1: Autolyse (Mixing – 10 minutes)
In a large bowl, combine the 400g bread flour and 100g whole wheat flour. Add 325g of the water (reserve 25g for later) and mix with your hand or a dough scraper until no dry bits remain. It will be a shaggy, messy dough. Cover the bowl with plastic wrap or a damp towel and let it rest for 30 minutes to 1 hour. This autolyse period allows the flour to fully hydrate and starts developing gluten naturally.
Step 2: Mix in Starter and Salt
After the rest, sprinkle the 100g of active sourdough starter over the dough. Add the remaining 25g of water and the 10g of salt. Wet your hand and squeeze everything together through your fingers until the starter and salt are fully incorporated. The dough will break apart and look messy again, but it will come together. This takes a few minutes. If using butter, oil, or sweetener, add them now.
Step 3: Bulk Fermentation & Stretch and Folds (3-4 hours)
This is the first, long rise. Cover the bowl and let it rest for 30 minutes. Now, we’ll perform a series of “stretch and folds” to build strength without kneading.
-
Stretch and Fold Technique: With a wet hand, reach under one side of the dough, stretch it up, and fold it over the top to the other side. Rotate the bowl 90 degrees and repeat. Do this 4-6 times, until the dough tightens into a ball.
-
Schedule: Perform a set of stretch and folds every 30 minutes for the first 2 hours (so 4 sets total).
After the final set of folds, cover the bowl and let the dough rest for the remaining time. The bulk fermentation is complete when the dough is puffy, has visible bubbles on top and sides, and has increased in volume by about 50-75%. It should feel light and airy, not dense.
Step 4: Pre-Shape (5 minutes)
Lightly flour your work surface. Gently scrape the dough out of the bowl. Using your bench scraper, carefully shape it into a round by tucking the edges under. Don’t degas it too much. Let this round rest, uncovered, on the counter for 20-30 minutes. This is the “bench rest” and allows the gluten to relax.
Step 5: Shape and Place in Proofing Basket (10 minutes)
After the rest, flip the dough over (seam-side up) on a lightly floured surface. Gently stretch it into a rectangle roughly the width of your loaf pan.
-
Shaping for a Pan: Fold the top third down to the center, then the bottom third up over it (like a letter). Then, starting from the top, tightly roll the dough towards you, sealing the seam with the heel of your hand as you go. Pinch the final seam closed.
Place the dough seam-side up in a lightly floured proofing basket or a bowl lined with a heavily floured kitchen towel.
Step 6: Cold Proof (Overnight – 8 to 12 hours)
Cover the basket with a plastic bag or a damp towel and place it in the refrigerator. This long, slow cold fermentation develops incredible flavor and makes the dough easier to handle and score.
Day 2: Bake!
Step 7: Final Proof & Preheat (Day 2 – 2-3 hours before baking)
The next morning, remove the dough from the fridge. Do not let it come to room temperature before proofing. It will start its final proof cold. Keep it covered in a warm spot in your kitchen. This final proof can take 2-4 hours. You’ll know it’s ready when the dough has puffed up noticeably, feels light and jiggly, and a finger gently poked into it leaves a shallow indent that springs back slowly.
-
Timing Tip: About 1 hour before you’re ready to bake, preheat your oven to 450°F (230°C) and place your empty loaf pan on the middle rack to heat up.
Step 8: Score and Load the Oven
Carefully remove the hot loaf pan from the oven. Place a piece of parchment paper over your proofed dough, then invert the basket to release it. Gently place the dough (with the parchment) into the hot loaf pan. The seam side should now be down.
Using a lame or very sharp knife, make one long, shallow slash down the center of the loaf (lengthwise). This is called scoring and controls where the bread expands.
Step 9: Bake with Steam (20 minutes)
Place the loaf pan in the oven. To create steam, toss a few ice cubes into the bottom of the oven (or into a separate, oven-safe pan on the rack below) and immediately close the door. The steam keeps the crust soft during the initial expansion, allowing the bread to rise fully.
Bake for 20 minutes at 450°F (230°C).
Step 10: Finish Baking (20-25 minutes)
After 20 minutes, carefully remove the loaf from the pan by lifting it out with the parchment paper. Place the naked loaf directly on the oven rack. Reduce the oven temperature to 400°F (200°C) and continue baking for another 20-25 minutes, until the crust is a deep, golden brown and the loaf sounds hollow when tapped on the bottom.
-
Optional: For an extra-crispy crust, turn off the oven and prop the door open with a wooden spoon, leaving the loaf inside for another 10 minutes.
Step 11: The Most Important Step: Cool Completely!
Transfer the baked loaf to a wire rack. Do not slice into it for at least 2-3 hours. It is still finishing its cooking process internally, and slicing it while hot will result in a gummy, sticky crumb. Patience is key!
Once completely cool, slice, toast, and enjoy the fruits of your labor. This loaf keeps well at room temperature in a bread bag or wrapped in a tea towel for 3-5 days. It also freezes beautifully.
Nutrition Information
Please note: The following nutrition information is an estimate provided as a courtesy and calculated based on the ingredient list using standard bread flour and water. It does not include any optional add-ins. Actual values may vary depending on the specific ingredients and brands you use. This information is for informational purposes only and should not be considered a substitute for professional dietary advice.
| Nutrient | Amount Per Slice (based on 16 slices) |
|---|---|
| Calories | ~145 kcal |
| Total Fat | ~0.8 g |
| Saturated Fat | ~0.1 g |
| Carbohydrates | ~29 g |
| Dietary Fiber | ~1.2 g |
| Total Sugars | ~0.2 g |
| Protein | ~5 g |
| Sodium | ~240 mg |