Prep Time: 20 minutes
Inactive Time: 8-12 hours (overnight fermentation) + 1-2 hours (final rise)
Cook Time: 15-20 minutes
Total Time: Approximately 10-14 hours (mostly hands-off)
Yield: 8-10 English muffins
Category: Breakfast, Bread
Method: Stovetop
Cuisine: American, British-Inspired
Diet: Vegetarian
Description
There is simply nothing quite like a homemade English muffin. The nooks and crannies are deeper, the flavor is tangier, and the texture is far superior to anything you can buy at the store. If you have a sourdough starter that needs feeding, this is the perfect weekend project. These Easy Sourdough English Muffins use “discard” or active starter to create a wonderfully complex, slightly tangy flavor. They are cooked on a griddle, giving them a lovely golden-brown crust that stays soft and chewy inside. Toast one up, slather it with butter, and prepare to be amazed. Don’t be intimidated by the long timeline—most of it is hands-off fermentation, allowing the sourdough to work its magic.
Why You’ll Love This Recipe
-
Deep, Tangy Flavor: The long, slow fermentation gives these muffins a signature sourdough taste you can’t get from quick-rise yeast recipes.
-
Perfectly Craggy Texture: The high hydration and gentle handling create the iconic “nooks and crannies” that hold puddles of melted butter and jam.
-
Uses Sourdough Discard: This is a fantastic way to use up that unfed starter you might otherwise throw away during feedings.
-
Make-Ahead Friendly: The dough rests overnight, making the morning bake quick and easy. Cooked muffins also freeze beautifully.
Recipe Intensity
-
Skill Level: Intermediate
-
Hands-On Time: Low (20 minutes)
-
Waiting Game: High (requires overnight fermentation)
-
Overall: This recipe is easy in terms of technique but requires patience for the fermentation.
Ingredients
-
For the Dough:
-
250g (about 1 cup) active, bubbly sourdough starter or unfed discard (see notes)
-
250g (1 cup) milk, lukewarm (whole milk is best, but any kind works)
-
25g (2 tablespoons) unsalted butter, melted and cooled slightly
-
25g (1 ½ tablespoons) honey or granulated sugar
-
400g (about 3 ¼ cups) all-purpose flour or bread flour
-
5g (1 teaspoon) fine sea salt
-
-
For Cooking:
-
Cornmeal or semolina flour, for dusting
-
Unsalted butter or neutral oil (like avocado or canola), for the griddle
-
Step-by-Step Instructions
Part 1: The Overnight Dough (10 minutes hands-on)
-
Mix Wet Ingredients: In a large mixing bowl, whisk together the lukewarm milk, melted butter, and honey until combined.
-
Add Starter: Add the sourdough starter to the bowl and whisk until it is mostly dissolved into the liquid.
-
Add Dry Ingredients: Add the flour and salt. Mix with a spatula or your hands until a shaggy, sticky dough forms and no dry bits of flour remain. The dough will be quite soft and tacky. Don’t overmix; just ensure everything is incorporated.
-
First Rest (Bulk Fermentation): Cover the bowl with plastic wrap or a damp kitchen towel. Let it rest at room temperature for 1 hour.
-
Refrigerate Overnight: After the hour, place the covered bowl in the refrigerator. Let it ferment slowly for at least 8 hours, or up to 12 hours. This long, cold rise develops the signature sourdough flavor.
Part 2: Shaping & Second Rise (15 minutes hands-on, 1-2 hours waiting)
-
Prep the Surface: The next morning, lightly dust a clean work surface with flour. Generously line a large baking sheet with parchment paper and dust it heavily with cornmeal.
-
Turn Out Dough: Remove the cold dough from the fridge. It will have risen and be very puffy. Gently scrape it out onto the floured surface.
-
Shape the Muffins: The dough will be sticky. Lightly flour your hands and the top of the dough. Gently pat the dough out into a rough rectangle or circle about ½-inch to ¾-inch thick. Try not to deflate it too much. Use a 3.5-inch round cutter (or a wide-mouth jar ring) to cut out rounds. Press straight down; don’t twist, as twisting can seal the edges and prevent the muffins from splitting properly.
-
Place on Baking Sheet: Carefully transfer the cut muffins to the prepared baking sheet, placing them about 2 inches apart. Gently gather the dough scraps, re-roll to thickness, and cut out more muffins until all the dough is used.
-
Final Rise: Dust the tops of the muffins with more cornmeal. Cover them loosely with a piece of plastic wrap that’s been lightly sprayed with oil (to prevent sticking) or a clean, lint-free kitchen towel. Let them rise at room temperature for 1 to 2 hours, or until they are visibly puffy and feel light when you gently poke them. They won’t double in size but will become noticeably airier.
Part 3: Cooking on the Griddle (20 minutes)
-
Preheat Griddle: About 30 minutes before the rise is complete, preheat a large, heavy-bottomed skillet or griddle over medium-low to medium heat. You want an even, gentle heat.
-
Cook First Side: Carefully place a few puffed-up muffins onto the dry griddle, leaving space between them. Let them cook for 6-8 minutes. They are ready to flip when the bottoms are a deep golden brown.
-
Flip and Finish: Flip the muffins carefully. Cook for another 6-8 minutes on the second side. To ensure the centers are cooked through, you can transfer them to a 350°F (175°C) oven for 5-10 minutes, or press the sides gently—they should feel firm and spring back. If they feel doughy, give them a few more minutes on the griddle over lower heat.
-
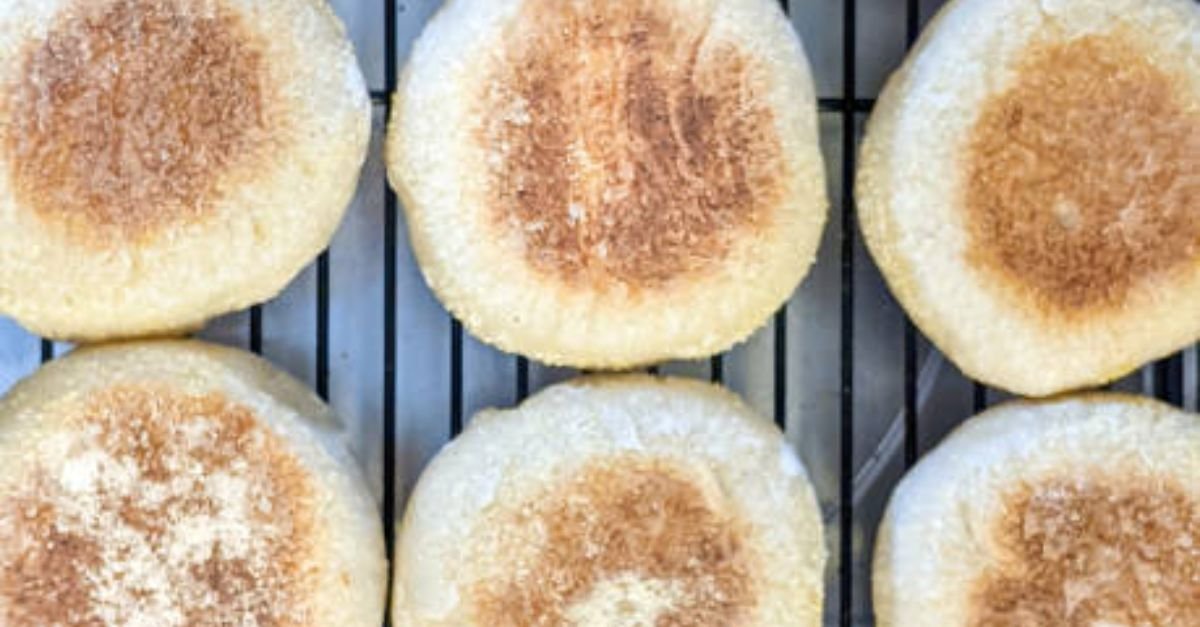
Cool: Transfer the cooked muffins to a wire rack to cool completely. This step is crucial for the texture to set.
How to Serve & Split
The secret to perfect nooks and crannies is in the splitting. Never cut an English muffin with a knife! Instead, take a fork and insert the tines all around the edge of the muffin, gently prying it open. This creates a rough interior surface that toasts up beautifully.
Storage & Freezing Instructions
-
Storage: Store cooled English muffins in an airtight container or a paper bag at room temperature for up to 3 days.
-
Freezing: These muffins freeze exceptionally well. Place cooled muffins in a single layer on a baking sheet and freeze until solid, then transfer to a freezer-safe bag. They will keep for up to 3 months. Toast them directly from frozen.
Nutrition Information
Serving Size: 1 muffin (based on 9 muffins)
Calories: 245
Total Fat: 5g
Saturated Fat: 2.5g
Cholesterol: 15mg
Sodium: 230mg
Total Carbohydrates: 42g
Dietary Fiber: 2g
Total Sugars: 4g
Protein: 8g