Prep Time: 15 minutes | Chill Time: 1 hour | Cook Time: 20-25 minutes | Total Time: 1 hour 40 minutes
Difficulty: Easy | Yield: About 100-120 small crackers (depending on size)
If you maintain a sourdough starter, you know the struggle: the discard accumulates faster than you can bake bread. While we love sourdough pancakes and waffles, this recipe for Sourdough Discard Crackers is arguably the most rewarding way to use up that “unfed” starter. They transform a humble byproduct into a gourmet, crispy, and addictive snack that rivals any high-end cracker you’d buy at the store.
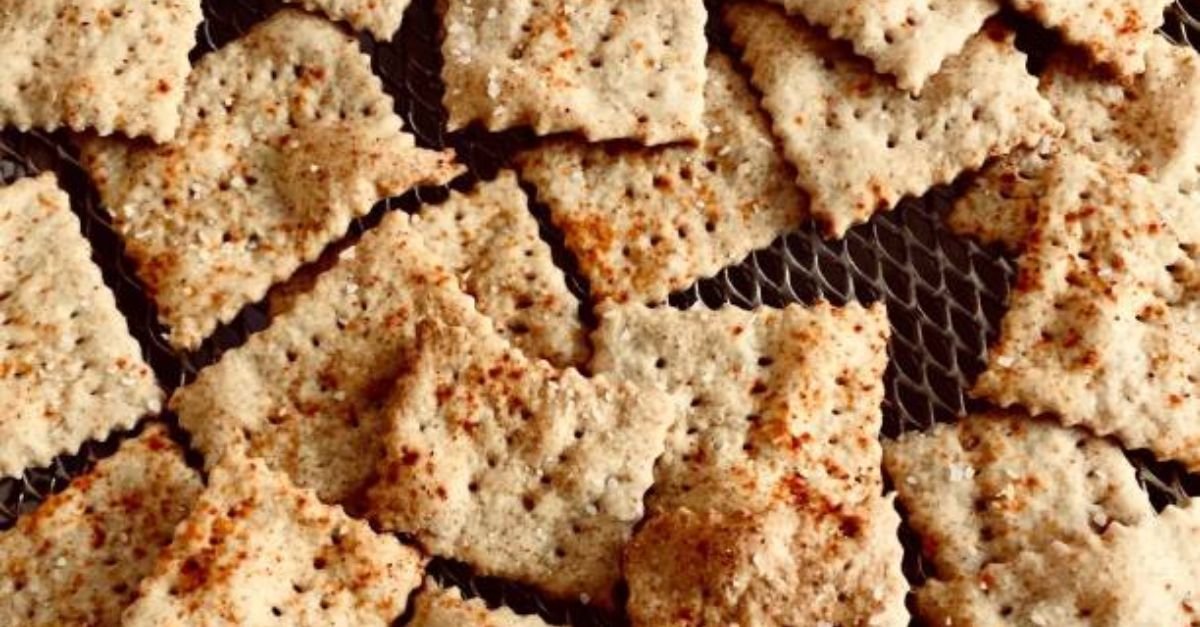
With a beautiful tang from the fermented starter and a shatteringly crisp texture, these crackers are incredibly versatile. Serve them with a creamy brie, a sharp cheddar, your favorite dips, or simply eat them by the handful straight from the cooling rack. The best part? They come together with minimal effort and are completely customizable with your favorite seeds, spices, and herbs.
Why You’ll Love These Crackers
-
Zero Waste: Turns your sourdough discard into something delicious.
-
Incredible Texture: Thin, light, and perfectly crispy, not hard as a rock.
-
Simple Ingredients: You likely have everything you need in your pantry right now.
-
Customizable: The flavor combinations are endless.
-
Better than Store-Bought: No preservatives, just pure, tangy, seedy goodness.
Ingredient Notes & Substitutions
-
Sourdough Discard: This recipe is designed for unfed, cold discard straight from the fridge. It doesn’t need to be active or bubbly. In fact, older, more acidic discard often yields a tangier cracker, which is a good thing!
-
Flour: All-purpose flour works perfectly. For a nuttier flavor and slightly more rustic texture, you can substitute up to 50% whole wheat flour. For a gluten-free version, use a high-quality 1-to-1 gluten-free baking flour blend.
-
Fat: Melted unsalted butter gives the richest flavor and crispiest texture. For a dairy-free/vegan version, you can substitute with melted coconut oil or a high-quality olive oil. Olive oil will result in a slightly more “shortbread” style crumb, but is still delicious.
-
Salt: Fine sea salt is best for mixing into the dough. Don’t skip it! It’s crucial for flavor. You’ll also use flaky sea salt (like Maldon) for sprinkling on top before baking.
Customization Ideas (Mix-Ins & Toppings)
This is where you can get creative. Before you roll out the dough, choose your adventure:
-
Everything Bagel: Mix 1 tbsp of everything bagel seasoning into the dough and sprinkle more on top.
-
Rosemary & Sea Salt: Mix 1 tbsp of finely chopped fresh rosemary into the dough. Top with flaky sea salt.
-
Spicy “Cheese-It” Style: Add 1/2 cup of finely grated sharp cheddar cheese and 1/4 tsp of cayenne pepper to the dry ingredients.
-
Seedy & Nutty: Mix 2 tbsp of a seed blend (sesame, poppy, flax, sunflower) into the dough.
-
Classic Black Pepper: Add 1 ½ tsp of freshly cracked black pepper to the dough.
Step-by-Step Instructions
Part 1: Making the Dough (Intensity: Low)
-
Combine Wet Ingredients: In a large mixing bowl, combine 240g (1 cup) sourdough discard and 60g (1/4 cup) melted butter (or olive oil). Whisk together until completely smooth and well-combined.
-
Add Dry Ingredients: Add 250g (2 cups) all-purpose flour and 1 tsp fine sea salt to the bowl. If you are using any dry mix-ins like seeds, herbs, or cheese, add them now.
-
Form the Dough: Mix with a spatula or your hands until a shaggy dough forms. It will seem a bit dry at first. Once it starts to come together, tip it out onto a clean countertop.
-
Knead Briefly: Knead the dough gently for just 1-2 minutes, until it forms a smooth, cohesive ball. Do not overwork it, or the crackers may be tough. The dough should be firm and not sticky.
Part 2: The Essential Chill (Intensity: Very Low)
-
Divide the Dough: Divide the dough into two equal portions. Shaping them into flat, rectangular discs will make them easier to roll out later.
-
Wrap & Refrigerate: Wrap each disc tightly in plastic wrap.
-
Chill: Refrigerate for at least 1 hour, or up to 2 days. This step is crucial. Chilling the dough:
-
Relaxes the gluten, preventing the dough from springing back when you roll it.
-
Firms up the fat (butter), which helps create that flaky, layered texture.
-
Allows the flavors to meld and deepen.
-
Part 3: Rolling & Cutting (Intensity: Moderate – Requires a little muscle)
-
Preheat & Prepare: Preheat your oven to 350°F (175°C) . Line two large baking sheets with parchment paper.
-
Roll it Thin, Very Thin: Remove one disc of dough from the fridge. On a lightly floured surface, place the dough and dust the top with a little more flour. Using a rolling pin, roll the dough out into a large, thin rectangle. Aim for a thickness of about 1/16th of an inch (1.5-2mm) . This is the #1 secret to crispy crackers. If they are too thick, they will be bready and soft. If the dough starts to resist, let it rest for 5 minutes and try again.
-
Trim for Perfection (Optional): For uniform, professional-looking crackers, use a pizza wheel or sharp knife to trim the ragged edges of the rectangle. (You can re-roll the scraps!)
-
Dock the Dough: Use a fork or a docker to prick the dough all over. This prevents it from puffing up in the oven and ensures a flat, crisp cracker.
-
Cut the Crackers: Use a pizza wheel, sharp knife, or fluted pastry wheel to cut the dough into your desired size and shape—small squares (1.5″ x 1.5″) or rectangles are classic.
-
Transfer & Top: Gently transfer the cut crackers to the prepared baking sheets, leaving a tiny bit of space between them (they don’t spread much). Sprinkle the tops generously with flaky sea salt and any additional seed toppings.
Part 4: Baking (Intensity: Low – Just waiting!)
-
Bake: Bake for 20-25 minutes, rotating the pans halfway through. The exact time will depend on how thin you rolled your dough.
-
Check for Doneness: The crackers are done when they are a deep, golden brown and feel completely dry and firm to the touch. The ones on the edges will brown faster. They will continue to crisp up as they cool.
-
Cool Completely: Let the crackers cool completely on the baking sheets. This is another critical step for achieving maximum crispiness. Do not move them until they are at room temperature.
Storage
Store your completely cooled sourdough crackers in an airtight container at room temperature. They will stay fresh and crispy for up to 2 weeks. If they lose a bit of their crunch, you can re-crisp them in a 300°F (150°C) oven for 5-7 minutes.
Nutrition Information
The following nutrition information is an estimate and provided as a courtesy. It will vary based on the specific ingredients used (type of flour, type of fat) and any mix-ins or toppings you add. This calculation is based on the base recipe with butter and all-purpose flour, and assumes the recipe yields approximately 100 small crackers.
| Description | Amount |
|---|---|
| Serving Size | 10 crackers |
| Calories | 140 |
| Total Fat | 6g |
| Saturated Fat | 3.5g |
| Cholesterol | 15mg |
| Sodium | 240mg |
| Total Carbohydrate | 19g |
| Dietary Fiber | 1g |
| Total Sugars | 0g |
| Protein | 3g |