Prep Time: 30 minutes (active) | Total Time: 12-16 hours (including overnight fermentation) | Difficulty: Medium | Yields: 1 standard loaf (about 16 slices)
This is the holy grail for sourdough enthusiasts who crave a sandwich bread with all the complex, tangy flavor of a rustic boule, but with the soft, tender crumb and sliceable structure perfect for lunchboxes and toast. Unlike its free-form cousin, this loaf is baked in a pan, resulting in a uniform shape ideal for sandwiches. The process is a gentle, slow fermentation that develops incredible flavor and makes the bread easier to digest. While it requires planning, the hands-on work is minimal and deeply rewarding.
The Starter You’ll Need
This recipe requires 150g of active, bubbly sourdough starter, fed 4-12 hours before you begin. If your starter lives in the fridge, feed it and let it sit at room temperature until it has at least doubled and passes the float test (a small spoonful dropped in water floats).
Ingredients
For the Levain (Pre-Ferment)
-
60g active sourdough starter
-
60g bread flour
-
60g lukewarm water
For the Main Dough
-
All of the levain (about 180g)
-
360g bread flour (high-protein, about 12-13%)
-
40g whole wheat flour (for flavor and nutrition)
-
292g lukewarm water (adjusted for your flour’s absorption)
-
9g fine sea salt
-
14g honey or maple syrup
-
14g unsalted butter or olive oil, softened
For Finishing
-
Neutral oil or butter for greasing the pan
-
Milk, cream, or melted butter for brushing (optional)
Equipment
-
9×5 inch (or 1 lb) loaf pan
-
Stand mixer with dough hook (optional, but helpful)
-
Digital kitchen scale (highly recommended for accuracy)
-
Dough scraper
-
Large bowl or proofing container
-
Clean kitchen towel or plastic wrap
Step-by-Step Instructions
Day 1: Evening – Create the Levain
-
Mix (5:00 PM example): In a small jar or bowl, combine the 60g active starter, 60g bread flour, and 60g lukewarm water. Stir until no dry flour remains.
-
Ferment: Cover loosely and let it sit at room temperature (70-75°F / 21-24°C is ideal) for 5-7 hours, or overnight (up to 12 hours). It should be very bubbly, domed, and at peak activity when ready.
Day 2: Morning – Mix & Bulk Fermentation
-
Autolyse (9:00 AM): In the bowl of your stand mixer (or a large bowl), combine the 360g bread flour and 40g whole wheat flour. Add the 292g lukewarm water and the honey. Mix with a dough hook or by hand until just combined and no dry flour remains. It will be a shaggy mass. Cover and let this mixture rest for 30-60 minutes. This autolyse allows the flour to fully hydrate and develops gluten with minimal effort.
-
Add Levain & Salt: After the autolyse, add the entire ripe levain and the 9g of salt to the bowl. Begin mixing on low speed (or by hand with a sturdy spoon) until incorporated.
-
Develop the Dough: Increase the mixer speed to medium-low (or begin kneading by hand on a lightly floured surface). Mix for 5-7 minutes. The dough will be sticky but should begin to smooth out and pull away from the sides of the bowl. In the last minute of mixing, add the 14g of softened butter. Continue mixing until the butter is fully incorporated and the dough is smooth, elastic, and slightly tacky but not overly sticky.
-
Bulk Fermentation: Lightly oil a clean bowl or proofing container. Place the dough inside, turning to coat it lightly in oil. Cover tightly. This is the start of bulk fermentation, which will last about 4-6 hours at room temperature.
-
Stretch & Folds: During the first 2 hours of bulk fermentation, perform 3-4 sets of “stretch and folds,” spaced 30 minutes apart. To do this, wet your hand, grab one side of the dough, gently stretch it upward, and fold it over the center. Repeat this around all four “sides” of the dough. This strengthens the gluten structure without heavy kneading. After the final set, let the dough rest undisturbed for the remainder of bulk ferment. It should look lively, have increased in volume by about 50%, and be dotted with small bubbles.
Day 2: Afternoon – Shape & Final Proof
-
Shape (2:00 PM example): Gently turn the dough out onto a lightly floured surface. Using your hands or a rolling pin, pat and shape it into a rough rectangle, about 8×10 inches. Tightly roll the dough up from the short end, like a cinnamon roll, sealing the seam with the heel of your hand as you go. Pinch the final seam closed. Roll it back and forth gently to even out the loaf.
-
Prepare Pan: Lightly grease your 9×5 inch loaf pan with oil or butter.
-
Final Proof: Place the shaped loaf, seam-side down, into the prepared pan. Cover loosely with a damp kitchen towel or plastic wrap. Now, you have two options:
-
Ambient Proof: Let it rise at room temperature for 2-4 hours, until the dough has risen just above the rim of the pan (about 1 inch above).
-
Cold Retard (Recommended for Flavor): Let the dough sit at room temp for 30 minutes, then place the entire covered pan in the refrigerator for 8-16 hours (overnight). This slow proof deepens the sour flavor and makes timing bake day easier.
-
Day 2 (or 3): Baking
-
Preheat: At least 30 minutes before baking, place a rack in the center of your oven and preheat it to 375°F (190°C). If the loaf is in the fridge, take it out while the oven preheats.
-
Score & Glaze (Optional): For a professional look, use a sharp lame or razor blade to make a shallow slash down the center of the loaf. Brush the top lightly with milk, cream, or melted butter for a soft, golden crust.
-
Bake: Place the loaf pan in the preheated oven. Bake for 40-50 minutes. The bread is done when it has a deep golden-brown crust, sounds hollow when tapped on the bottom, and the internal temperature registers 205-210°F (96-99°C) on an instant-read thermometer.
-
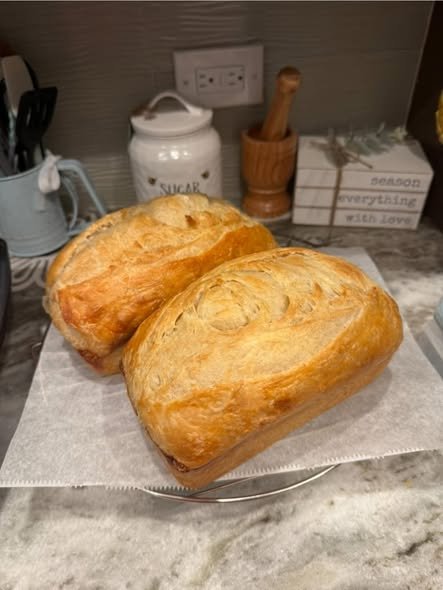
Cool: This is the hardest but most crucial step! Immediately remove the bread from the pan and transfer it to a wire cooling rack. Let it cool completely for at least 3-4 hours before slicing. Slicing too early will release steam and result in a gummy, dense crumb.
Baker’s Notes & Tips for Success
-
Hydration is Key: Flours absorb water differently. If your dough feels impossibly wet during mixing, add 1 tablespoon of flour at a time. If it feels stiff and dry, add water 1 teaspoon at a time.
-
Temperature Rules: Fermentation time is entirely dependent on the temperature of your kitchen. In a warm kitchen (78°F/26°C), the process will be faster. In a cool kitchen (68°F/20°C), it will be slower. Watch the dough, not the clock.
-
The Float Test: If unsure if your starter is ready, do the float test. Drop a small spoonful into a glass of water. If it floats, it’s active and bubbly enough to use.
-
Storage: Once completely cool, store the bread in a bread bag or wrapped in beeswax wrap at room temperature for up to 3 days. For longer storage, slice and freeze for up to 3 months. Toast slices directly from the freezer.
Nutrition Information (Per Slice, estimated 1/16 of loaf)
-
Calories: ~140 kcal
-
Total Fat: 1.5g
-
Saturated Fat: 0.8g
-
Cholesterol: 3mg
-
Sodium: 220mg
-
Total Carbohydrates: 27g
-
Dietary Fiber: 1g
-
Sugars: 1g
-
Protein: 4g